
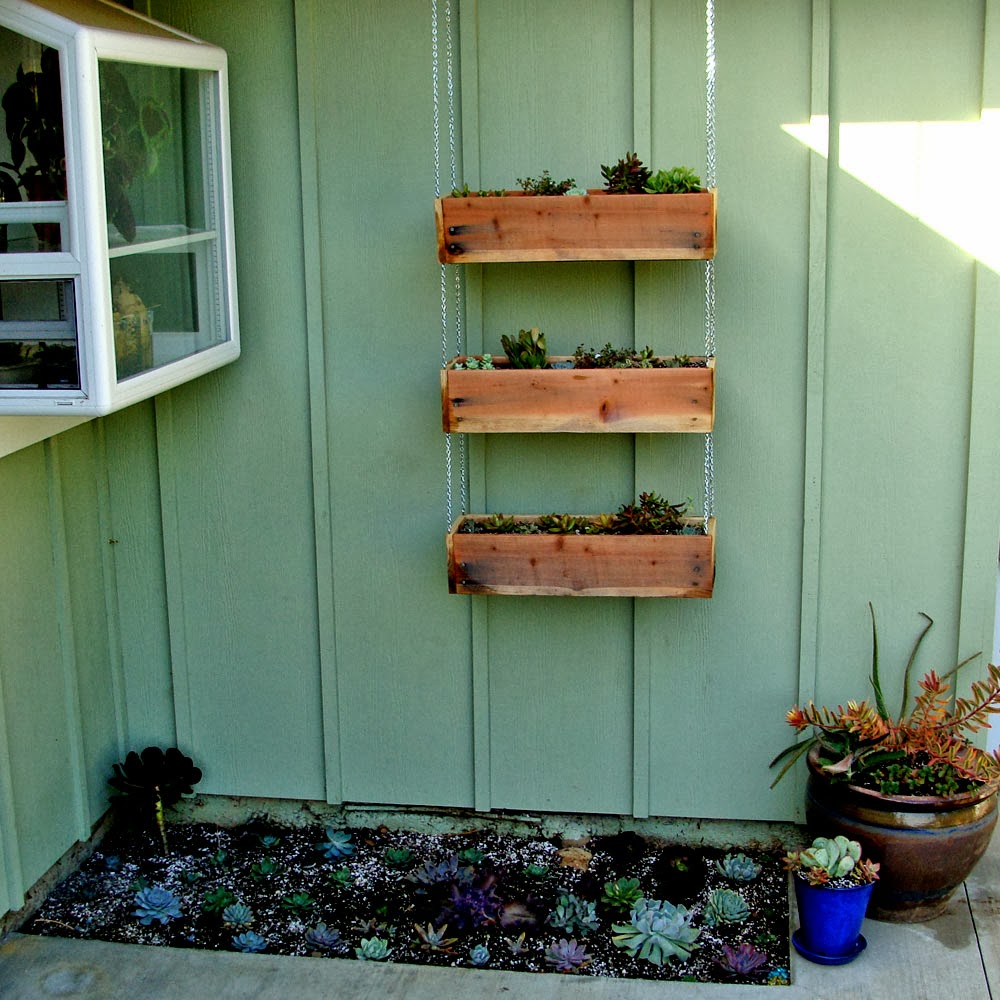
Here is my latest succulent project - a three-tiered hanging planter! I recently planted the little bed below with succulents, and since they won't grow very tall, I wanted something to add interest to the big blank wall above.
You will need:
- plants
- three wood planters* (mine are about 24" x 6" x 6" each)
- soil suitable for succulents**
- paper coffee filters (optional)
- chain (I used about 16' total for my project)
- 20 eye bolts
- four ceiling hooks
- pliers
- screwdriver
- drill
- level (optional)
** My preferred mixture for planting succulents is about 50% potting soil, 20% sand, and 30% pumice. At first I couldn't find pumice locally so I used perlite, but the pumice really is nicer. If you have trouble finding it locally like I did (check feed stores; apparently it's sometimes used for drying out horse stalls), you can get it on Amazon or eBay.

Here are my boxes prior to modifying them for my project. I considered sealing them but decided I wanted a weathered look eventually, so I left the wood bare.

Of course you will need a nice assortment of plants to choose from - enough to fill your boxes.

Here are the eye bolts (1-5/16", it looks like) and the chain I used.

My pots didn't have drain holes, so I drilled three in each planter.

I pre-drilled holes in the corners of each planter prior to inserting the eye bolts. You'll need to drill all four corners, both top and bottom, on two planters, and just the four on top for the third planter.

Get the eye bolts started, tightening them as much as you can comfortably do by hand.

When they start to get hard to turn, use pliers or a screwdriver to turn them.

Tighten those puppies down. Remember, you need eye bolts on the top AND bottom corners of two boxes, but just on the top of the third one.

I like to cover the drain holes with paper coffee filters to keep soil from washing out.

I learned the hard way that it's a lot easier to plant prior to stringing the boxes together, so once you have all your eye bolts installed, go ahead and fill the boxes with soil and start planting!

I had intended to try to have my soil level very close to the top edge of each planter so that my plants (many of which are fairly low-growing) would be as visible as possible over the edge of the boxes. Since succulents need so little water, they don't need a lot of basin area up top for water. I thought I'd done a good job of keeping everything high up, but right after I got my boxes planted, we had a major downpour, and the soil compacted quite a bit from the heavy drenching - so I would recommend lightly watering your soil in prior to planting and final leveling to make sure it's not going to compact on you like mine did.

After your boxes are all planted, figure out how long you want the lengths of chain between the boxes to be (mine were around 9 or 10 inches), and cut eight equal lengths (or use pliers to open the links if you don't have cutters).
Figure out how long you want your top lengths of chain to be, and cut those as well. Since mine were going to hang from underneath an angled roof line, the front two had to be a little shorter than the back two.
Install four ceiling hooks, being sure to space the hooks equal to the measurements of the centers of your eye bolts on the boxes.

Hang your four upper lengths of chain from the ceiling hooks. (Thanks for the help, SuperHubby!)
Use pliers to open the end of the bottom-most chain link, hook all four opened links onto the top eye bolts of your upper planter, then close the links shut around the eye bolts. This will be easier with two people!


Work your way down, using the shorter lengths of chain to hang the middle planter from the top one, and finally the lower planter from the middle one, continuing to use the pliers to open and close the end links as needed.

Stand back, smile, and enjoy your pretty new planters!

If you have any questions or comments, if anything is unclear, or if you have pictures of your own finished tiered planter project to share, please let me know! I hope you enjoyed this project. Feel free to share wherever you like, linking back to this blog post, and if you are a jewelry lover, please be sure to check out my work!

Assorted handmade fair trade gemstone rings by McFarland Designs.
No comments:
Post a Comment